 PaperPull
Getting started
From download to your first archive.
Fifteen minutes the first time, most of it waiting for a bank's website. Every screenshot below is the real program on a folder of made-up installs, so the names and numbers are invented.
1. Install 2. Open it 3. Pick a provider 4. Sign in 5. Pilot 6. Run All 7. Find the PDFs 8. Spreadsheets Next month When it does not work
1. Install
Windows. Download PaperPull-<version>-setup.exe from the latest release and run it. It installs into your own user folder, so it needs no administrator password. The installer is not yet code-signed, so Windows shows a blue "Windows protected your PC" box the first time. Click More info, then Run anyway. If you would rather check the file first, the release page lists its SHA-256, and the code-signing policy explains why the warning is there. Do not turn off SmartScreen or antivirus for this or any installer.
macOS, Apple Silicon. Open PaperPull-<version>-arm64.dmg and drag PaperPull to Applications. It is signed and notarized, so there is no warning. Intel Macs are not supported. You need Chrome, Edge, Brave, Vivaldi or Opera installed, since Safari cannot be driven the way PaperPull needs.
Linux. No package. Clone the repository and follow the README's quick start, which runs the same control panel from source.
Updating later is the same download, run over the old one. Your downloads, history and signed-in browser profiles are wherever you put them and are not touched.
2. Open it
Double-click PaperPull. A small window opens (a terminal on the Mac) and your web browser opens the control panel at http://127.0.0.1:8765. That address is your own computer. The panel is a page only your browser can reach, and the small window is what serves it, so leave both open while you use PaperPull.
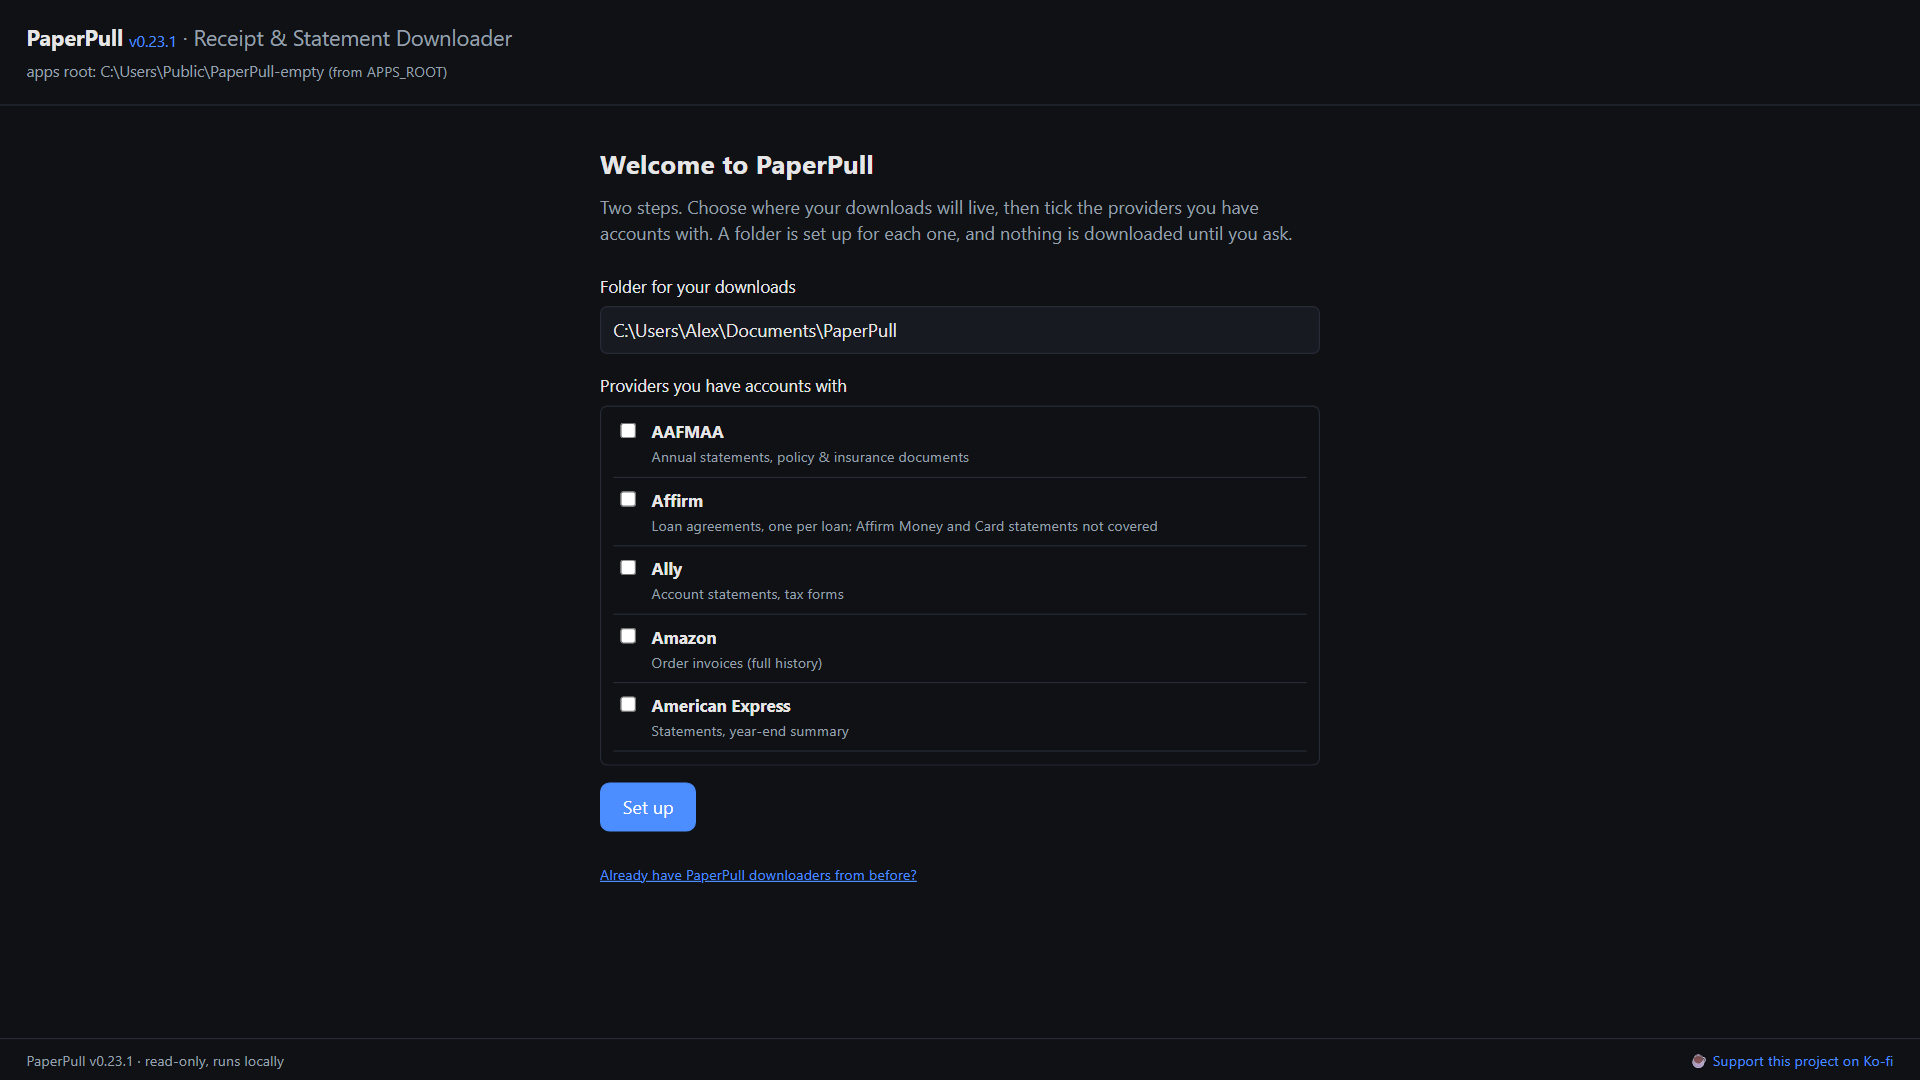
The first time, the panel asks two things: a folder for your downloads, and which providers you have accounts with.
3. Pick a provider
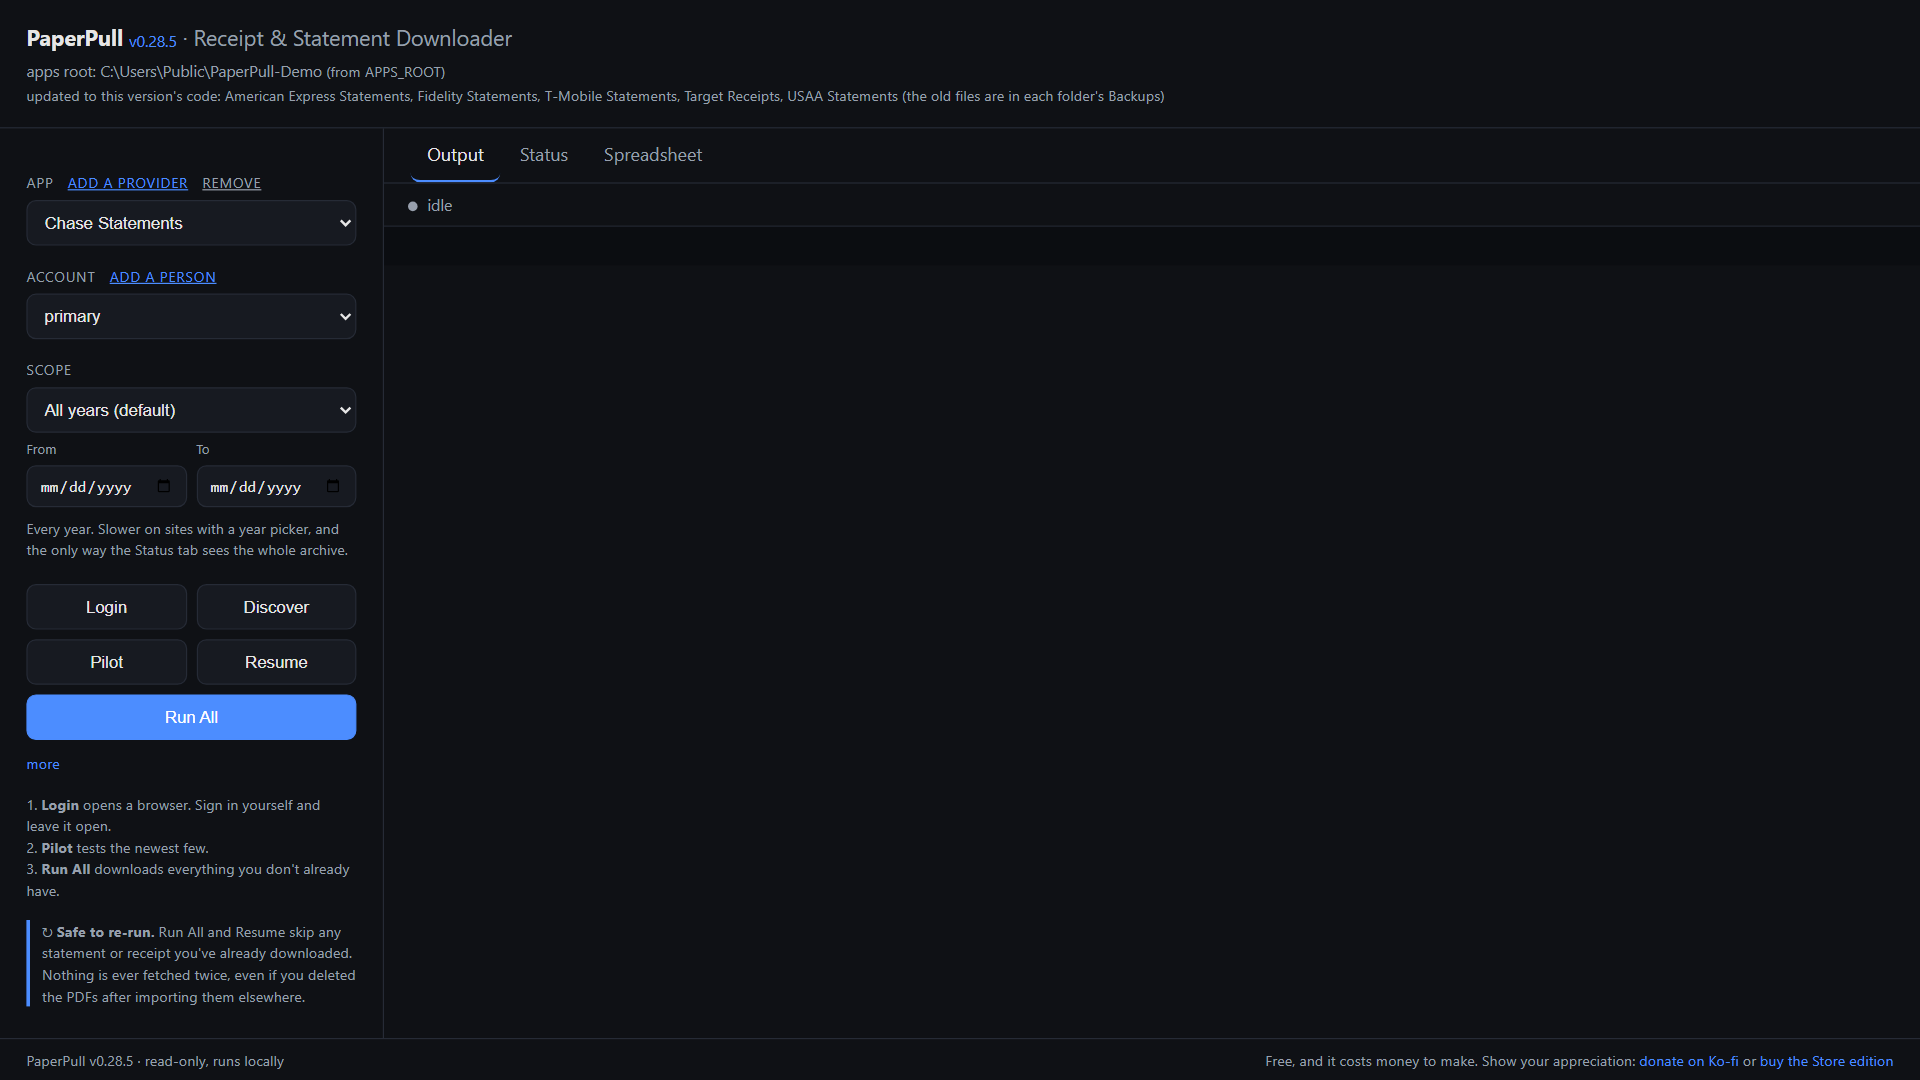
The App box at the top left lists the providers you set up. Choose one. Under it, Account is primary until you add a second person, and Scope is "All years" by default, which is what you want for a first run.
4. Sign in, yourself
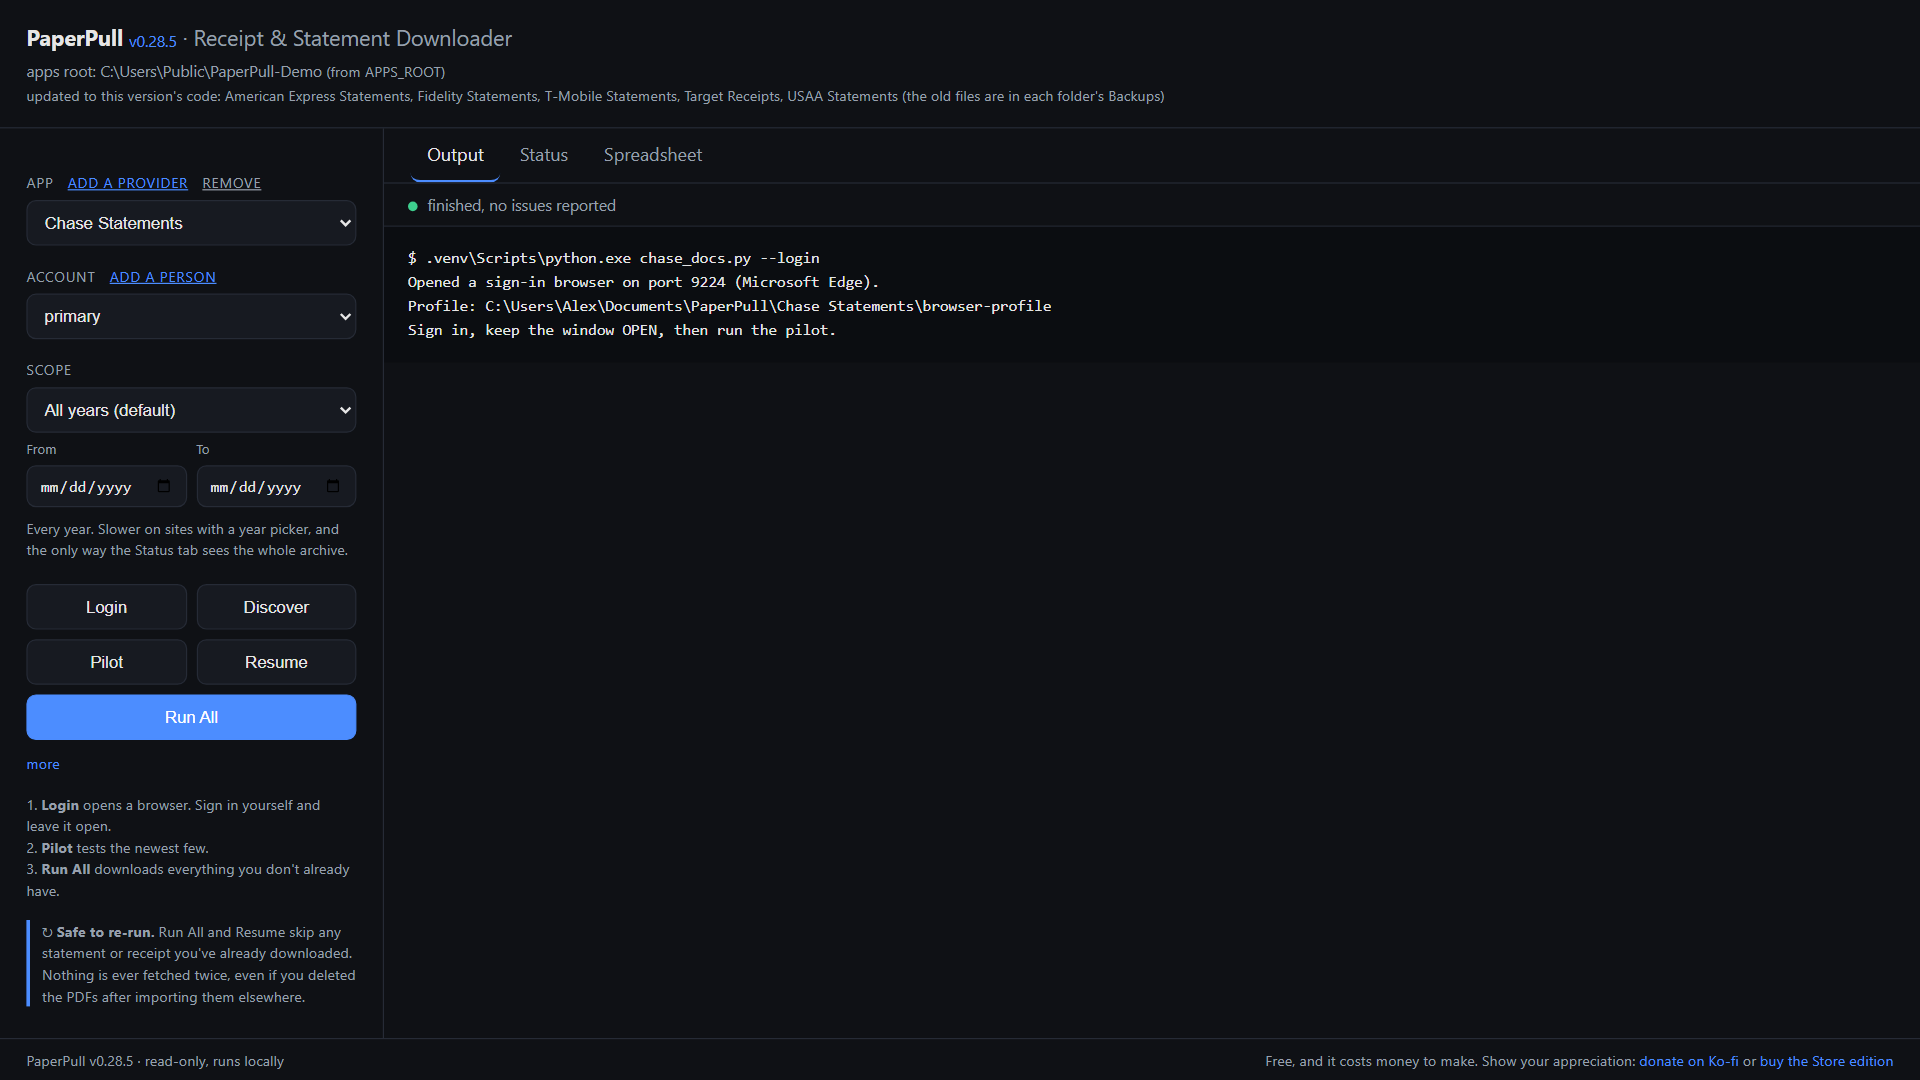
Click Login. A browser window opens on the provider's own sign-in page. It is your regular browser (Edge, Chrome, or whichever you have) but with a fresh profile that PaperPull keeps for this provider, so it knows none of your other logins. Sign in there the way you would on a new computer, answer the two-factor prompt, and leave that window open.
PaperPull never sees what you type there. It attaches to the window afterward and reads what you can see.
Password manager? That fresh profile starts with no extensions. Install yours into it once, from the extension store in that window, and it stays for every Login after. Nothing about the profile is shared with your everyday browser.
5. Pilot, the small test
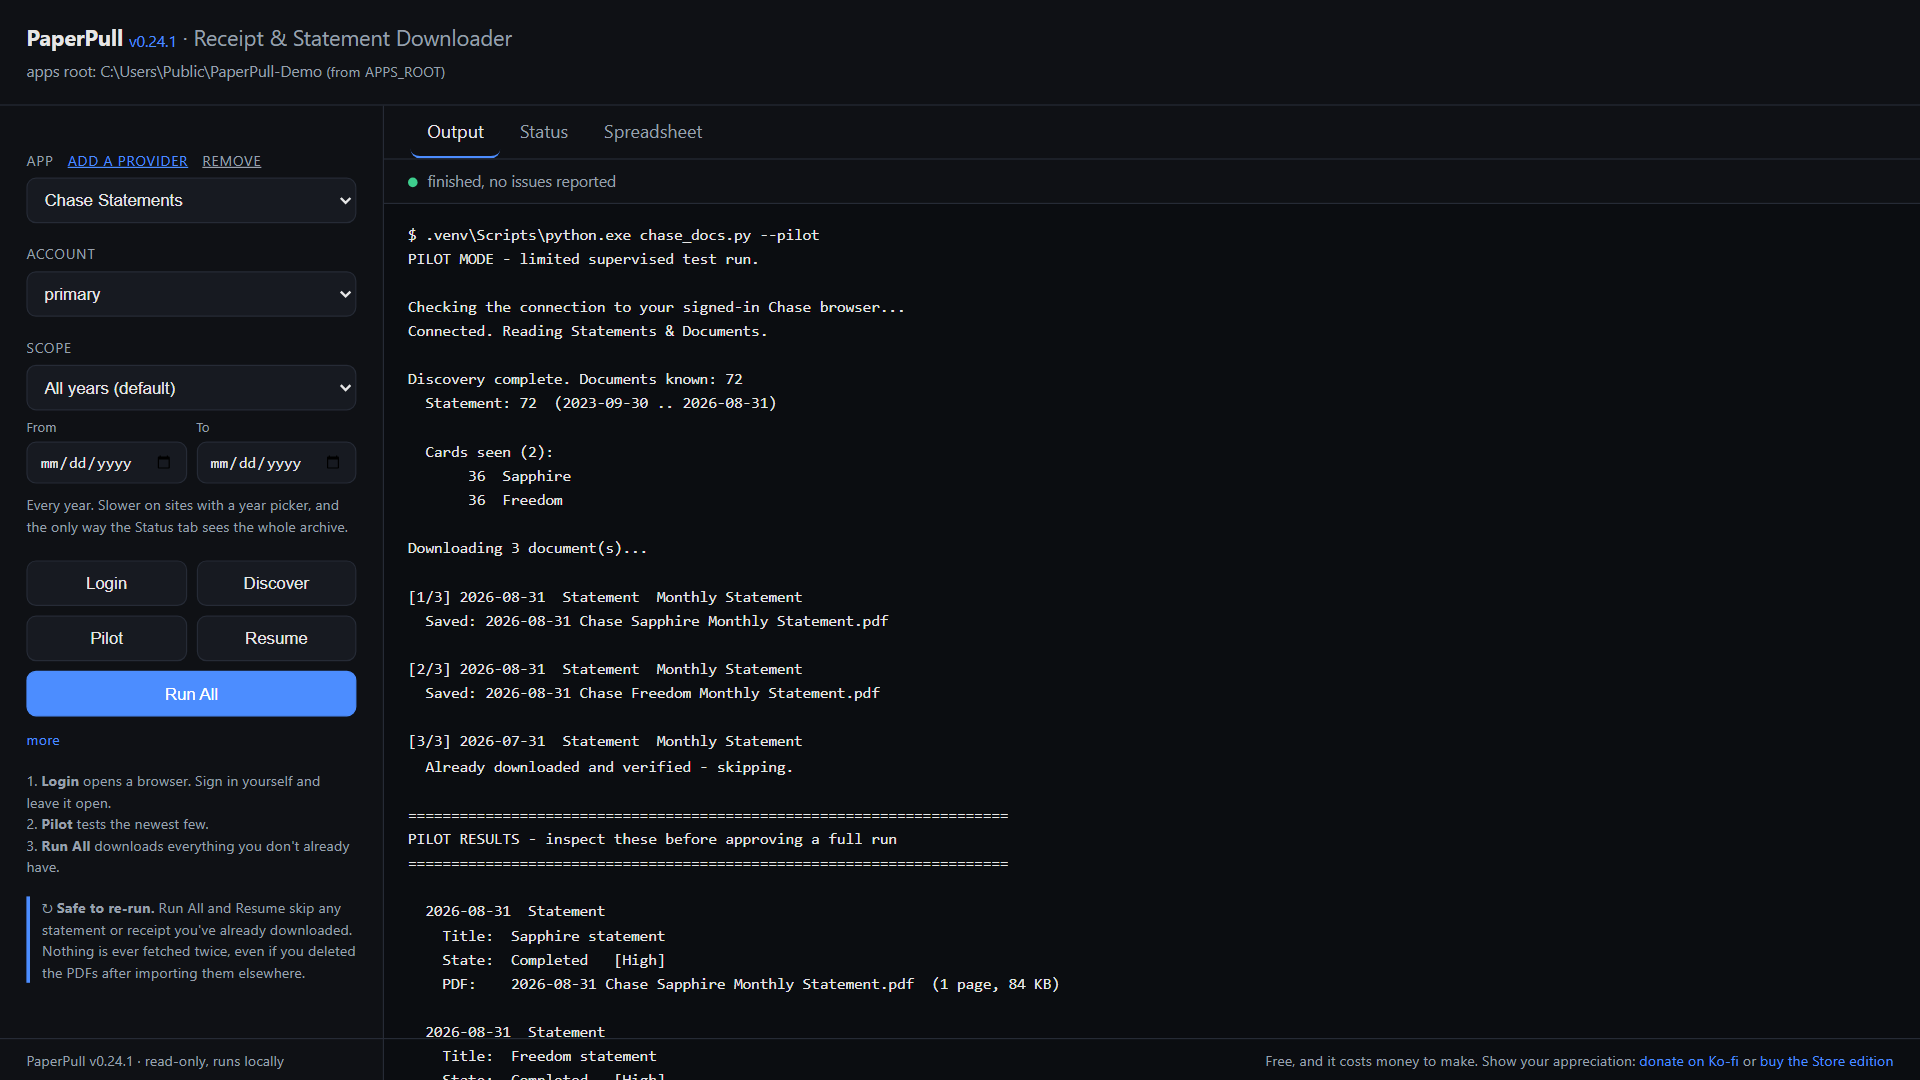
Click Pilot. PaperPull reads the provider's document list and downloads only the newest few, then prints what it found and what it saved. This is the moment to open one of the PDFs and check it is the right thing. Nothing further runs until you start it.
6. Run All
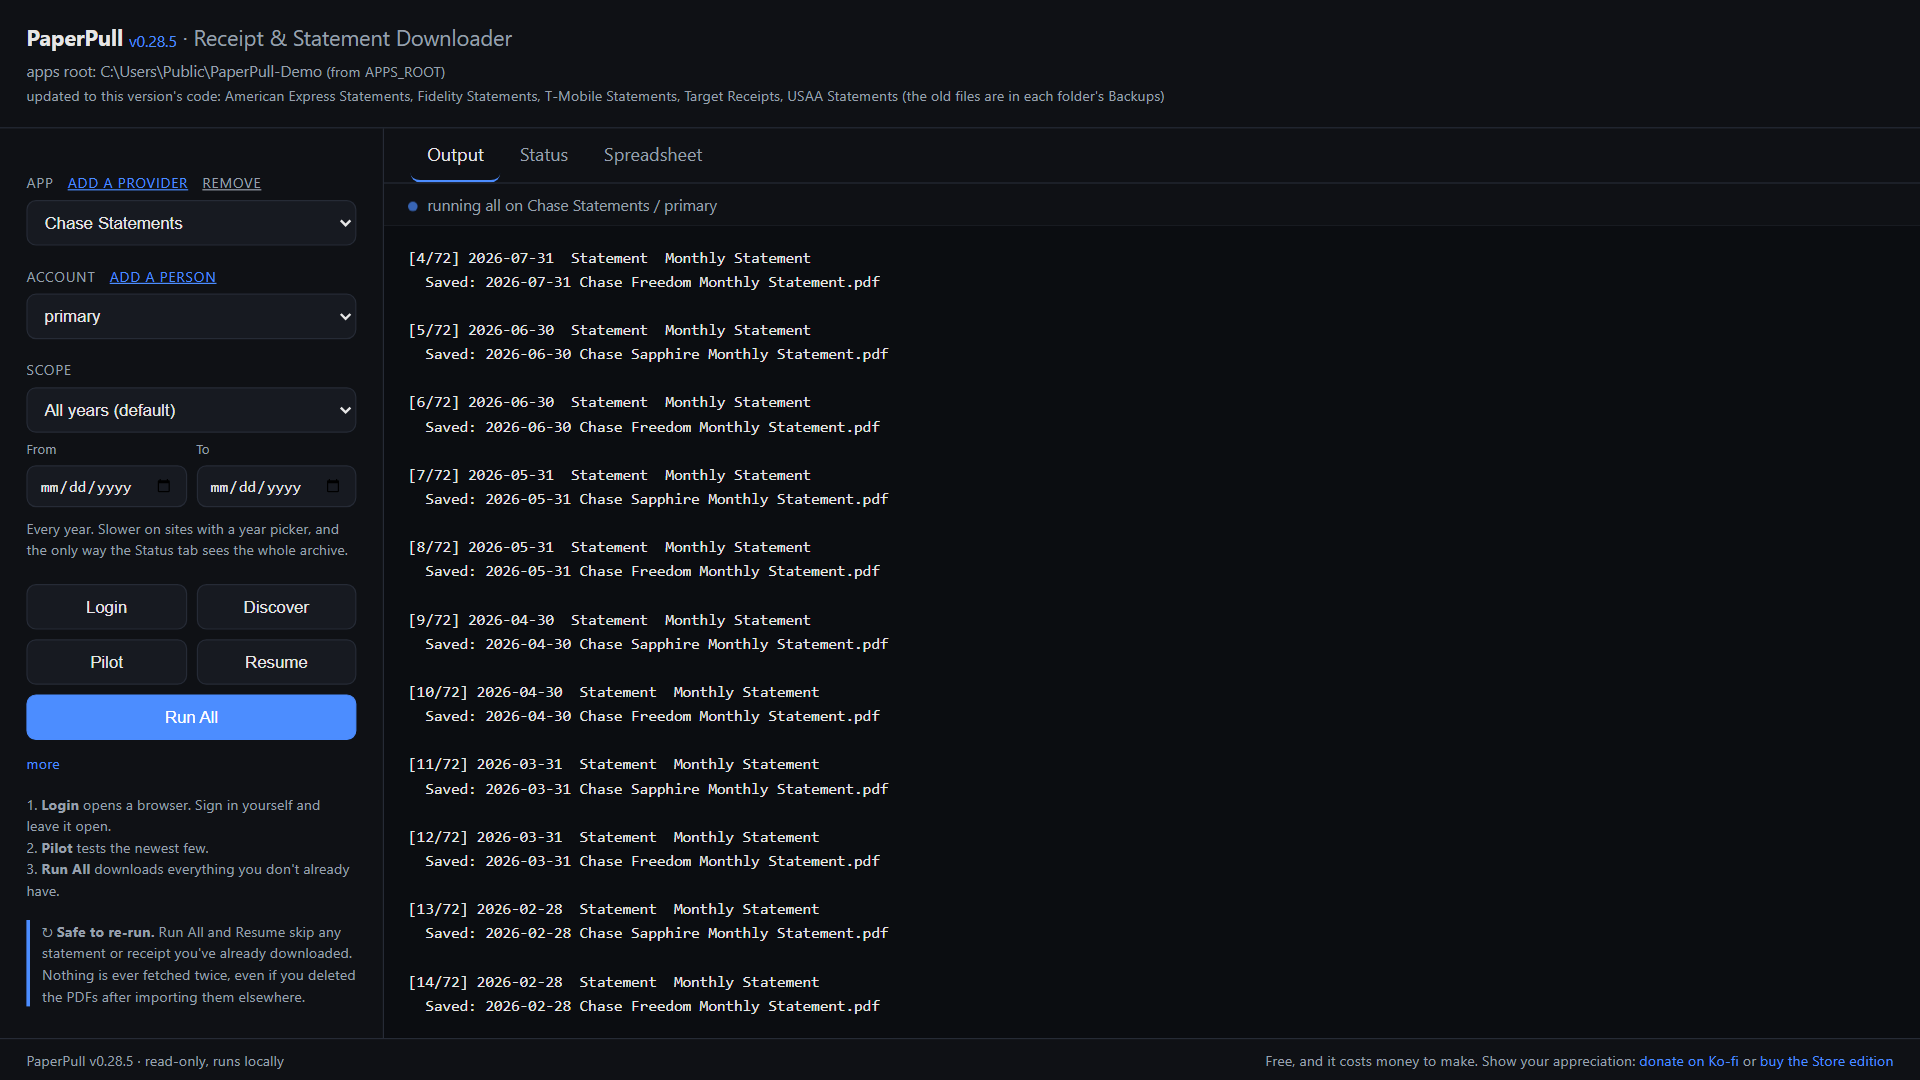
Click Run All. This is the historical backfill: every account, every year, every page the provider offers. It pauses a few seconds between documents, the way a person would, so a big archive takes minutes rather than seconds. You can keep using your computer. If it is interrupted, Resume picks up where it stopped.
7. Find the PDFs
Inside the folder you chose is one folder per provider, and inside each, the documents by kind. Every file is named <date> <provider> <account> <kind>.pdf, so it sorts by date and says what it is without opening it. Beside the PDFs is a Document Index.csv (or Order History.csv for a store) listing every one.
PaperPull/
  Chase Statements/
    Statements/
      2026-08-31 Chase Sapphire Monthly Statement.pdf
      2026-08-31 Chase Freedom Monthly Statement.pdf
      2026-07-31 Chase Sapphire Monthly Statement.pdf
      ...
    Chase Document Index.csv
    progress.json            what has been downloaded, the memory that makes reruns cheap
  Amazon Receipts/
    Online/
      2026-09-16 Amazon Electronics Receipt.pdf
      ...
    Amazon Order History.csv
    Amazon Receipt Index.csv
Move the PDFs anywhere you like, into a filing system, onto a NAS, into Paperless-ngx. progress.json is what remembers them, so a rerun does not fetch them again. Leave that file where it is.
8. The spreadsheets
The Spreadsheet tab has two buttons. Build Excel workbook gathers every receipt provider's line items into All Purchases.xlsx, one row per item, with an Orders sheet and a Summary of spend by store and year. Build transactions workbook reads the transactions out of your statement PDFs into All Transactions.xlsx, checking each statement against its own printed balances. Both land in your downloads folder, and Show in folder opens it.
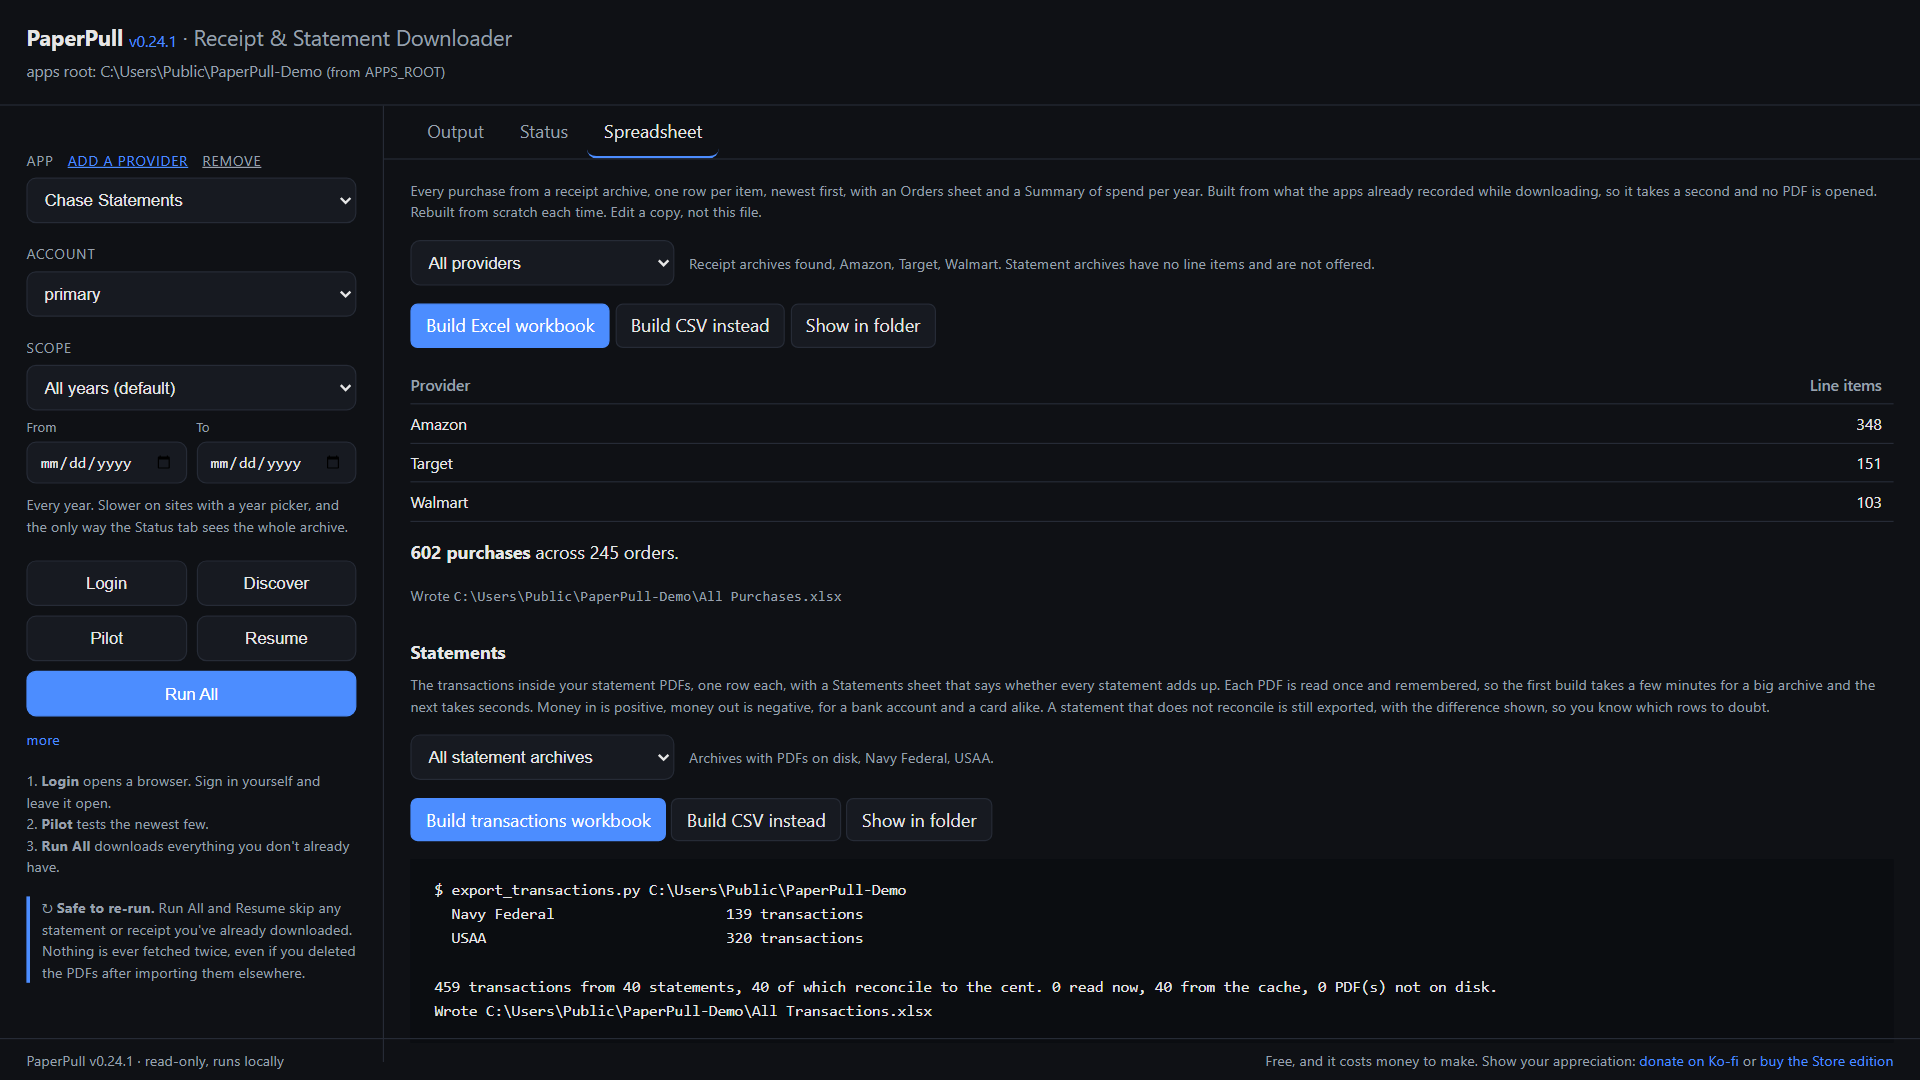
Only providers that record line items feed the purchases workbook (the stores), and only statement PDFs that carry text feed the transactions workbook. The directory marks which is which.
Next month
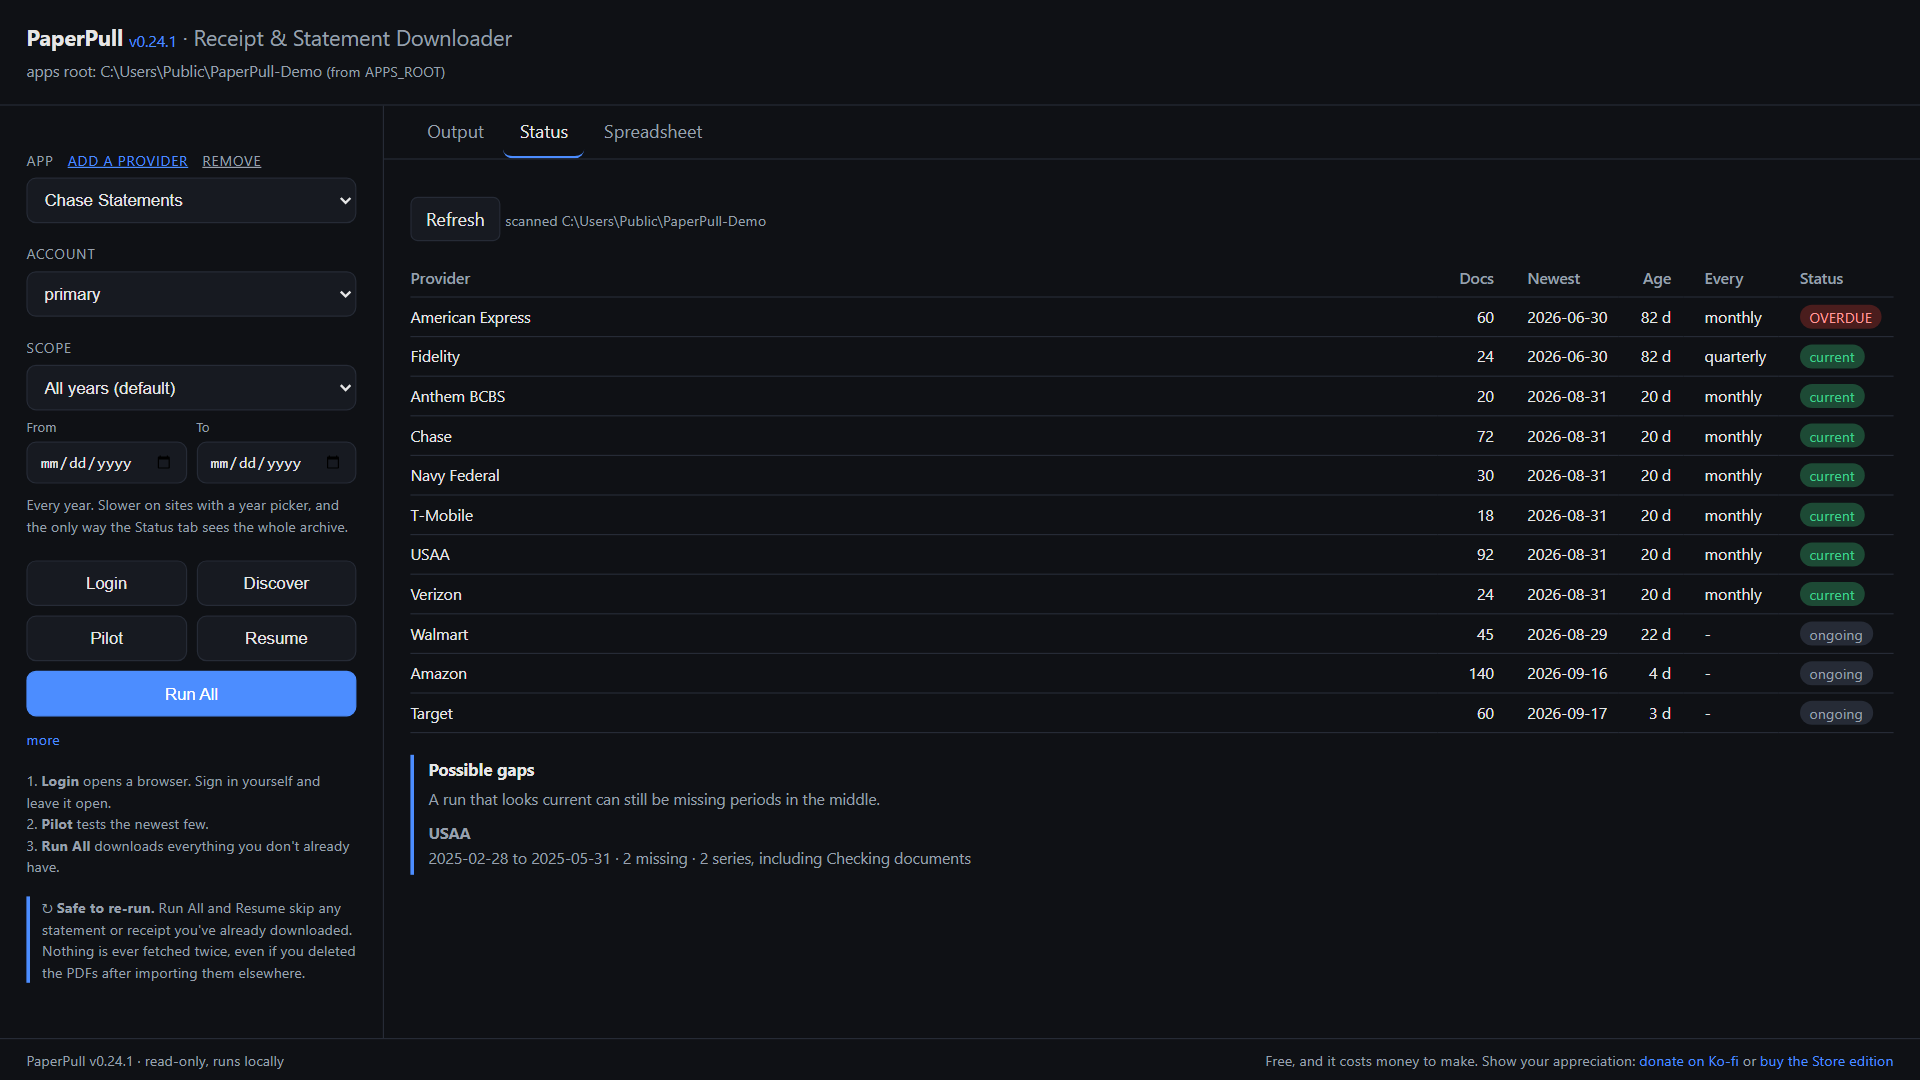
Open PaperPull, pick the provider, click Run All again. It fetches only what is new. The Status tab tells you which archives are due, and where a month is missing from the middle of a run.
A second person
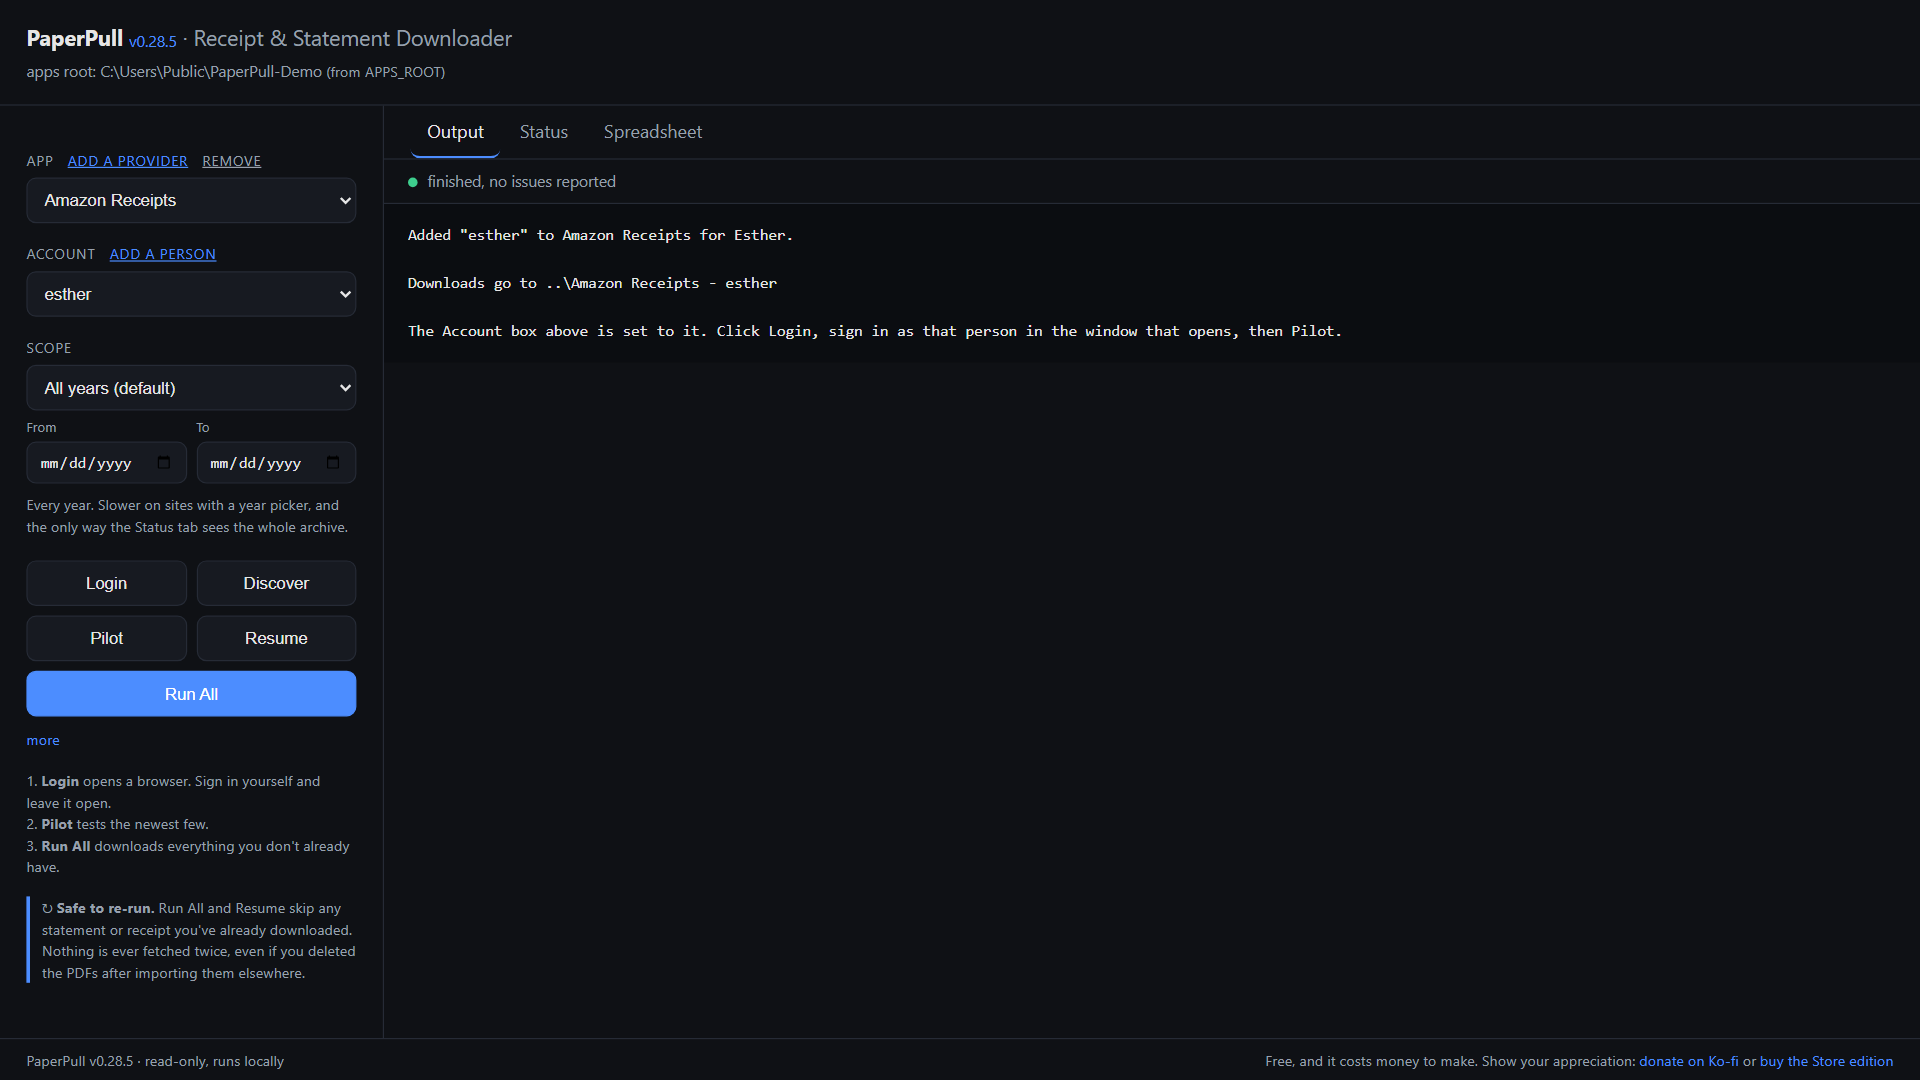
Beside the Account box, add a person makes a second account for the same provider, with its own folder next to yours, its own sign-in window and its own history. Pick it in the Account box, click Login, and sign in as them.
When it does not work
- "Could not connect to your signed-in browser." The Login window was closed, or the sign-in timed out. Click Login again, sign in, leave the window open, and retry.
- The panel says the provider signed you out or wants a code. Do it in the browser window. PaperPull stops and waits rather than trying to get past any security check.
- Discovery found 0. The provider's site changed, or you are on a page the app does not expect. Click more under the buttons, then Diagnose. It writes a file describing the page's shape with every number masked, which is what a fix is built from. Attach it to a report.
- A PDF went to Manual Review. It was saved but did not pass the check that it is the document it claims to be. Open it and look. It is usually a sign-in page the site served instead of the statement.
- SmartScreen or a Mac warning. See Install. Never disable a security feature to get past it.
When you attach anything to a report, never include a password, a browser profile folder, a token, or an unredacted statement. The Diagnose file is safe to attach because it masks numbers. A screenshot of the panel's output is fine too.
Everything above, in more depth, is in the README. Questions go to Issues or support@paperpull.net.